
Kaizen Success Stories
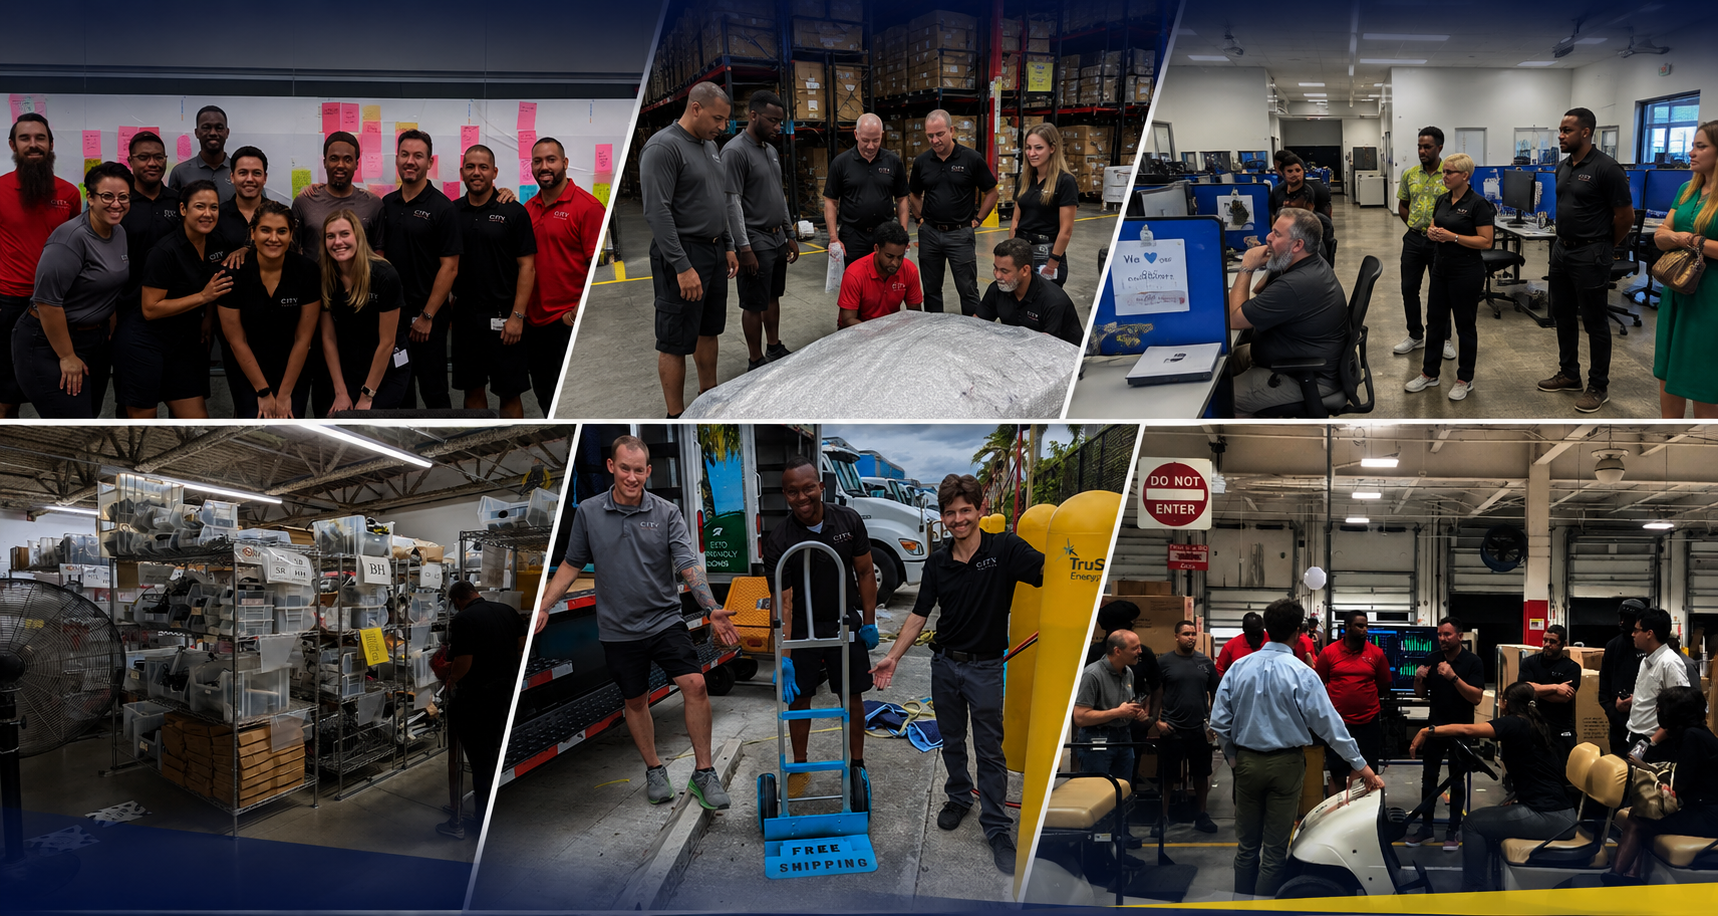
Real Manufacturing Results. One Kaizen at a Time
Explore real-world Kaizen success stories showing how manufacturing teams solved critical problems, improved performance, and created sustainable results.

Breaking Through - The Edge
In 2005, I was asked to help a team reduce the changeover time of a painting operation at a ceiling tile manufacturing plant in Oregon. The approach I used was SMED – Single Minute Exchange of Die. The goal was to reduce the existing changeover time by 50% or more, while improving the safety of the work.
In 2005, I was asked to help a team reduce the changeover time of a painting operation at a ceiling tile manufacturing plant in Oregon. The approach I used was SMED – Single Minute Exchange of Die. The goal was to reduce the existing changeover time by 50% or more, while improving the safety of the work.
After training the team, we took a walk on the factory floor to observe a changeover in progress and see if we could generate any improvement ideas. As with most SMED events, we saw a ton of improvement opportunities related to the existing changeover and the team was excited they would be able to help everyone in the process.
Towards the end of the walk, we stopped at the quality testing station and saw something that didn’t look right to us. The Quality Technician was using a box knife to cut four 2-foot edges of the ceiling tile off by hand. It looked difficult, unsafe, and extremely inefficient. When we asked her more about it, she told us she was required to measure the color of the face and edges of the ceiling tiles. The only way to get the colorimeter to read the edge of the ceiling tile was to make these cuts, allowing the tester to be placed directly on the edges. She also told us it made her wrists hurt. On a break, I verified with plant leadership they were also very concerned about this requirement. It was their number one safety concern in the facility and a number of engineers had studied the issue with no practical solution.
Following the walk, the team went back to their meeting room and listed all of the improvement ideas they had. They then prioritized the ones they wanted to work on to reduce changeover time. During the next two days, many of the highest priority ideas were implemented and the team was extremely excited about the improvements they were able to make.
At a break, a mechanic on the team came up to me and asked if it would be ok for him to work on something outside of the prioritized list of improvements the team had identified. I could tell something was bothering him, so I asked him to tell me more about what he was thinking. “Adam, I can’t get that edge cutting process out of my mind. It’s not right that we are putting our people at risk. I think I have a solution, and if you give me an hour to work on it, I can come right back to the team to help out with the other efforts.”
Kaizen is a team sport, and the team needs to be aligned around what everyone is doing. I asked the team what they thought. They enthusiastically supported the mechanic’s efforts. So much so that one of the operators volunteered to help him work on his idea. We couldn’t wait to see what they would come up with.
About an hour and half later, both team members came back with grins a mile wide. They brought a contraption that looked like a standard vise with a two-foot wide angle iron attached to each jaw. Curious, we stopped our other work to watch a demonstration of their invention. They put a 2-foot ceiling tile into the vise vertically, with the edge of the tile in the jaws and closed the vise carefully. Then, with a swift tap, the ceiling tile broke off cleanly at the edge, across the entire 2-foot length. We were stunned. One of our team members stepped up and tried the next of the four edges, and it broke off just as cleanly. One by one, we all tried it and saw how quick and easy it was to break off the edges. Now, we gave it the ultimate test – we brought it to the Quality Technician and showed her how to use it. She easily broke off the edge and immediately gave the mechanic a hug in a show of gratitude. It was probably the only hug the mechanic ever got at the plant!
We were so proud, but knew we had to finish our other work and gain alignment from plant leadership that our new method would meet the quality testing requirements. During the rest of the Kaizen, we implemented as many of our improvement ideas as possible, then created an overall changeover procedure that we verified, practiced, and used to train the rest of the operators on the line. The changeover time had been reduced significantly, but we wouldn’t feel like we had won until we implemented the new edge breaking process. So, we decided to build a final report to win over the plant leadership.
We invited plant leadership to see the new changeover procedure, which the team demonstrated for them. Some of the leadership team even participated, to see for themselves how much easier and safer it had become. They were extremely pleased, but we had saved the best for last.
Our creative mechanic invited the Quality Technician to join him in front of the group of plant leaders. Then, another team member brought out the vise and handed a ceiling tile to the Quality Technician. She put it in the vise, gave it a tap, and the edge broke right off, as clean as could be. In my life, I have never seen a collective group of people’s jaws drop at the same time, but it happened right then. After they got over their initial shock, the Operations Manager said, “Let me try that.” He did, and got the same result.
Everyone wanted a turn, and when it was over, the Safety Manager said, “This has been our number one safety risk. We have spent over 6 months trying to solve it the conventional way and haven’t been able to do so. Your team worked together and solved it so quickly. We need more teams to help us solve our problems in this way. Thank you!” Then, she gave the mechanic the second hug he had ever received in the plant. After blushing, he admitted to the group that in all of his years working at the plant, he had never done anything as impactful as this. He also reminded everyone that this was a prototype, so there may be an improved way of doing the work. Many years later, the original vise was being used in the plant without a complaint.

Improving Changeover Time in 4 Simple Steps
Have you ever watched an auto race? If so, you probably noticed what happens when a car enters Pit Row and is tended to by a whole team of people trying to get it back on the track as fast as possible. If you wondered how they knew what to do and how they didn’t get in each other’s way, the answer is SMED.
Have you ever watched an auto race? If so, you probably noticed what happens when a car enters Pit Row and is tended to by a whole team of people trying to get it back on the track as fast as possible. If you wondered how they knew what to do and how they didn’t get in each other’s way, the answer is SMED.
SMED stands for Single Minute Exchange of Die. It was developed by Dr. Shigeo Shingo in the 1960’s and 1970’s on behalf of Toyota. Dr. Shingo was interested in reducing the time and effort that it took to change a production line from one product to the next. By intense study and trial and error, he developed a 4-step method to drive all changeovers down to less than 10 minutes, thus coining the term single minute exchange of die. For auto racers, they use SMED to improve their auto changeover times and have achieved times below 15 seconds.
Changeover reduction is a team sport, just like in NASCAR, so picking the right team is critical. Bring people together who have had experience with the changeover being studied, use their differing opinions and techniques and encourage sharing and learning. By doing this and applying SMED, you should be able to reduce changeover time by more than 50%. You should also be able to improve the safety of the changeover for everyone.
STEP 1 – Identify All Elements of the Existing Changeover
The first step in SMED is to identify all elements of the existing changeover. This is done by observing the changeover as it occurs. Use a changeover that is typical for the process. Teams use tools such as a stop watch, video, and spaghetti diagram to truly understand everything that is happening during the changeover. Rather than just discussing things, they observe the changeover and then discuss it to better understand the current situation. It is also not unusual for team members to mimic the steps of the changeover so they can see the impact and difficulty of the changeover for themselves.
The spaghetti diagram is a paper exercise that shows everywhere a person travels during the changeover, whether it is to get tools, information, or do work on equipment. To use it, you should have a general layout of the area being worked on, then place a pen or pencil on the layout, moving it to the places that the worker moves during the changeover. Don’t lift the pen or pencil. If there is more than one worker performing the changeover, there should be more people creating the spaghetti diagram. At the end of that exercise, the lines on the page tend to look like spaghetti and people are amazed at the amount of travel required to complete the changeover.
STEP 2 – Separate All Elements into External and Internal
The next step in SMED is to identify what steps or elements can be performed while the line is running (External elements) and what steps must be performed while the line is down and waiting (Internal elements). Process Improvement Partners saw an example of this in one of our sessions. After a production run was completed, the press was shut off, a die was removed, the die was returned to storage, and the new die was brought back to the press from the storage area. At that point, every step was Internal, meaning that the line was not running while each step was completed. However, the team soon realized that the retrieving of the new die could have been done in advance of the changeover and the storage of the other die could be done after the line was back up and running. The team identified all of the elements that were external, and this step saved more than 25% of the changeover time.
STEP 3 – Convert Internal Elements to External Elements
The third step challenges the team’s creativity and they start to devise ways of doing some of the changeover steps that originally had to be done while the line is down and finding ways of completing them while the line is still running. A team we worked with created a fixture that allowed parts to be positioned for installation prior to the line stopping. This saved a significant amount of time and the fixture was built with existing materials, so no money was spent. Another example is to connect a tool to the equipment, so that it is immediately accessible to do the work once the line has been stopped. There are so many examples of this that teams can do research through the internet to get ideas, or they can visit other manufacturers to see the ideas in action.
STEP 4 – Streamline All Elements
In this step, the team thinks of ways of shortening time and effort required to do any remaining elements. They prioritize and work on the internal elements first, and then work on any of the external elements that have opportunity for improvement. This is a great time to look at the video and the spaghetti diagram again and see if the amount of travel can be reduced by the repositioning of tools, materials, and equipment, or if another sequence would be more efficient. Trial the new procedure, redraw the spaghetti diagram, and get the input of all team members to ensure that the new steps are truly better for them.
Once all steps of SMED have been completed, the team should observe the new changeover procedure and verify that it is truly an improvement. Time is one measurement, but effort, travel, and the anecdotal input of those performing the new changeover procedure are also important. People need to feel that the new way is better than what they had been doing personally. Because change is difficult, the team needs to develop methods to sustain the improvements that they created. Once they do so, they will realize the benefits of their efforts.

A Simple Way to Think about a Problem You Want to Solve
Many years ago, I was having difficulty getting my mind straight about a problem that I wanted to solve. A co-worker of mine introduced me to a thing he called a “Task Cycle”. Once I understood it, I had a simple way to go about solving problems and executing tasks.
Many years ago, I was having difficulty getting my mind straight about a problem that I wanted to solve. A co-worker of mine introduced me to a thing he called a “Task Cycle”. Once I understood it, I had a simple way to go about solving problems and executing tasks.
The Task Cycle was developed in the early 1990’s by Paul Boulian and revised by Marlyn Rabenold eight years later. I had the good fortune of meeting Marlyn and was amazed at the simplicity of thinking that can be used to help solve the most complex problems. Now, I want to share it with you.
The Task Cycle has 4 components: Purpose, Products, Process, and Functional Capabilities. It is truly a cycle and can be visualized in this way:

When you are planning a task (or planning to solve a problem), you follow the cycle counter-clockwise, from Purpose to Products, Process, and then Functional Capabilities. When Executing a task, you follow the cycle clockwise and start at the Functional Capabilities and end at Purpose.
Purpose
This is the reason that we are trying to do something, or the problem that we are trying to solve. That seems simple, and it is, but building a clear purpose statement is critical, and should not be taken lightly. As is said, the first step in solving a problem is know that you have one in the first place. When building a clear Purpose statement, consider and communicate why you want to do something, as much or more than what the specific task is. Consider these components of the Purpose statement with this recommended format:
“TO” – describe the task to be done or the problem to be solved
“IN A WAY THAT” – describe the benefit to be realized by the accomplishment of the task. Think in terms of the customer of the task.
“SO THAT” – describe the impact or result the task will have on the organization
Using the experience of writing this article, here’s an example of a Purpose statement:
To write a description of the Task Cycle, in a way that:
- Exposes the reader to a new way of thinking about a task
- Provides a simple construct for dealing with a complex problem or effort
- Engages the reader’s interest
So that this knowledge will help readers in their efforts to solve problems in the future.
Clarity of purpose helps us gain alignment and support from those who will either help us with our task or those who have assigned the task to us.
Now that Purpose has been established, it’s time to move on to Products.
Products
Products are the output or results that we are trying to create when we accomplish the task or solve the problem. A good question to ask is, “If we accomplish the task or solve the problem, what would we see or know that reinforces that the task is complete or the problem is solved?” We aren’t always looking for a physical product, but also non-physical or virtual products. These can be timing, a new way of doing things, or other similar results. Products of the prior example could be:
1. Ten or more responses or inquiries about the article
2. Three shares of the article
3. A phone call to discuss more in detail about the article
Now that the Purpose and Products have been identified, it’s time to move on to Process.
Process
How are we going to get the products that tell us that we have achieved our purpose? What is the methodology or approach that we will use to do this? We can now design a process to specifically accomplish the purpose and deliver the products as stated. Whether we use existing tools and methodologies that we are familiar with, or do research and ask others for their input, we can now test our thinking and approach and see if it delivers the desired results. We want to think through the series of steps and actions that we will take in order to get where we want to go. Because we are clear on purpose and products, we can now design process in a way that has the least amount of effort and waste associated with it.
For the prior example, the process being used is to research the original thinking and documentation on the Task Cycle, consider my personal experiences with it, and try to describe it in a way that the reader can utilize practically. Time will tell if my process was properly thought out.
Functional Capabilities
Do you need people to help you accomplish your task or solve the problem? Do you need tools for this? Are there skills that need to be acquired? What else do you need to solve the problem or complete the task? These are the questions that should be answered in order to identify the functional capabilities needed.
When all four components of the Task Cycle are put together, they should be the foundation for the effort. You should share your thinking with others to see if you have missed any vital elements, always improving as you go. You might even need funding, and that is why it is critical to have alignment around your task cycle.
Earlier in the article, I stated that when you are executing a task or solving a problem, you now go through the task cycle in the opposite direction. What I mean is that you use the functional capabilities to follow the process, which delivers the products and ultimately achieves the purpose.
Although this is not new thinking, I believe that many have forgotten about the Task Cycle and are missing out on this simple way of solving problems and accomplishing critical tasks. I will be interested to see if I accomplished my task in providing you with information that you can use. Your feedback will let me know if I have done so.

Who is Your Customer?
We are all customers. We want what we want, when we want it, at the level of quality we expect, in the proper quantity. We are the final say as to whether a business will thrive, survive, flounder, or die. The business must deliver to our expectations, or we will not continue to purchase products or services that they offer.
We are all customers. We want what we want, when we want it, at the level of quality we expect, in the proper quantity. We are the final say as to whether a business will thrive, survive, flounder, or die. The business must deliver to our expectations, or we will not continue to purchase products or services that they offer.
It’s surprising how many businesses wrongly believe shareholders are their customer, rather than those who actually derive benefit from what they offer.
A key principle of Lean is that everything should be optimized to the benefit of the customer, and anything that doesn’t deliver value is considered waste and should be eliminated.
It is therefore critical that you understand who your customer is, what is most important to them, and what they perceive as value.
Identify Your Customer
Questions to consider to identify your customer(s):
Do they pay for your product or service?
Do they provide feedback about your product or service, and how it affects them directly?
Do your actions directly influence their behaviors?
Do they depend on you for the product or service that you deliver?
Sometimes, we need to look internally to identify our customer(s). For example, in a manufacturing plant, one department receives a product from another department. The receiving department is the customer of the delivering department, and requires the product to be the proper quantity, quality, and to arrive on schedule. Anything that deviates from this is waste and should be eliminated.
Likewise, the workers in the same manufacturing plant are the customers of the Leadership Team, who makes decisions on their behalf. Their families are also customers as strong business decisions keep paychecks rolling in.
What is Most Important to Your Customer
Once you have identified your customer(s), you then need to understand what they truly want from you or another provider. To find out, you can analyze market trends, speak to your Sales and Marketing departments, host focus groups, and/or go directly to your customers and find out. Oftentimes, customers may not be able to directly identify everything that they want, but with the proper questions, you should be able to get the heart of their issues. Consider these questions:
What do you like about the product or service that we provide?
What don’t you like about the product or service that we provide?
What issue or need are you trying to solve with the product or service that we provide?
What are we not providing that you wish we would provide?
What changes would you make to our product or service that would make things better for you?
What do you wish you could say to our CEO about the product or service that we provide?
It’s surprising how effective face to face communication can be with customers. It’s also surprising how few of us use this method to extract critical information from them. Most people appreciate the opportunity to have these conversations. Now let’s talk about value.
A Question of Value
If you have identified your customer and reviewed what’s most important to them, you should be close to answer how they define value. Value isn’t necessarily a monetary thing, but can be thought of as something that enhances the customer experience. Some examples include:
Reduces time and/or effort
Simplifies a task
Enhances quality of life
Makes them happy
Keeps them safe and secure
And the list goes on
Once you have identified your customer, what is most important to them, and how they define value, you are ready to attack and eliminate waste in your business. To understand more about waste, read the blog entitled, “The Eight Deadly Wastes.”

Use Standardized Work to Unleash Creativity
Most people don’t like being told what to do. They definitely don’t want to be told how to do it. But, with proper standardized work, we can show people the right way to do things and free their minds to work on more complex problems that they face.
Most people don’t like being told what to do. They definitely don’t want to be told how to do it. But, with proper standardized work, we can show people the right way to do things and free their minds to work on more complex problems that they face. The key is to develop standardized work that engages people, speaks to them at the appropriate level, and captures the routine aspects of a task in a way that ensures everyone follows it properly and easily. Once that occurs, they can concentrate on solving problems that aren’t covered by the standardized work.
When I was very young, I was told, “Don’t touch the stove top. It’s hot!” Naturally, that sparked my curiosity. I wanted to know how hot, so I had to touch it. Unfortunately, I got burned and learned a lesson. I should have asked “How hot?” or, “What happens if I touch it?” If I understood what and why and the implications, I may not have received a boo-boo. This was a valuable personal lesson, but it also provides a good structure for standardized work. Now that I didn’t have to touch the stove anymore, I was freed up to use my creativity to create other mischief.
How to Engage Your People to Develop Standardized Work
People tend to do things the way they are taught, the way they observe, or the way that feels right to them. Unfortunately, they may be doing things improperly, unsafely, or inefficiently. So, it is incumbent on you to help them see the better way to do their work. The best way is to engage them in the development of the work. I have found that you should engage at least three people who are currently doing the work so they can share experiences, approaches, and break the tie, if a final decision on how to proceed is needed. You should set the expectations that work must be accomplished safely and productively, but give them the freedom to use their experiences to guide them in the process.
What To Do
The first part of standardized work is to define what to do and the order in which the work must be done. Once you have engaged people who do the work to participate in this effort, have each one of them demonstrate their approach to the work. Those who are watching should provide feedback and ideas that would make the work safer and more efficient. Once all ideas are shared, help bring the group to consensus around the final procedure. Once they have done this, they should practice the new procedure and see if they have missed any vital elements. Following that, document the procedures with pictures, videos, and/or written process steps. The more visual the better, as you want to be able to explain the procedure to anyone in a short amount of time, and you want them to be able to demonstrate their understanding without much effort. Once they have reached consensus, you must gain agreement that the procedure will be followed the same way by everyone who does the work.
Why To Do It
You can’t guarantee people will follow the new procedure, just because it is safer and more efficient. They may not realize this is the case. Most people are willing to try something different than what they are used to if they understand why it will be a benefit to them. Therefore, the group that develops the new procedure should incorporate the “why” or benefits behind the steps in the new procedure. If they’re unable to do so, it probably means there aren’t real benefits and the procedure needs improvement. Keep working and improving the procedure until you have something that delivers a benefit. Once you have done that, it will be easier to sell the new procedure to others.
The Implications of the Work
The best standardized work results in safety and efficiency gains. These should be clear and measurable. After all, how do you know you’re winning if you’re not keeping score. So, the team should be able to identify and incorporate clear measures of the standardized work. For example, the procedure now takes six steps and 30 minutes, while in the past it took 12 steps and 48 minutes. Another example is the new procedure results in a higher yield rate than the old procedure. It is not uncommon to reduce the time required to accomplish a task by 30% to 50%, just by gaining alignment and simplifying process steps.
Using these three elements – what to do, why to do it, and the implications of the work should convince people to try this new way of operating. Once they are convinced, they should also see that by following this new process, their minds are freed-up to work on more complex problems, thus unleashing their creativity.
Here’s a real-world example: A production line was shutting down erratically. In the past, people would be blamed for not following procedures. With clear standardized work, the time to troubleshoot was reduced dramatically, as the human variables were eliminated. The team could focus on other reasons and quickly found the root cause of the problem, which was a switch that was shorting out.
We want people to be creative and improve things and solve complex problems. By creating clear standardized work that is consistently followed, we give people the opportunity to use their creative minds and drive positive results.

The 8 Deadly Wastes
The customer defines value for any product or service. If they aren’t willing to pay for something, it has no value to them. In the terminology of Lean, anything that doesn’t directly provide value to the customer is called “waste”. Further, there are eight specific types of waste.
The customer defines value for any product or service. If they aren’t willing to pay for something, it has no value to them. In the terminology of Lean, anything that doesn’t directly provide value to the customer is called “waste”. Further, there are eight specific types of waste. Once you know what they are, you can begin to spot them, and then work diligently to reduce or eliminate them. If you do, the customer experience will be improved and so will your operating results.
These are the eight deadly wastes:
Transportation
The movement of anything from place to place is considered waste, because it adds no value to the product or service being provided. It only adds time, and the potential for loss or damage. It may seem necessary to move things around in a process – putting things in trucks, putting things away on shelves, sending electronic data from one server to the next, but there is no change to the form or function of the thing being produced. The question to ask is, “how can we reduce or eliminate transportation in the process?”
Inventory
Ideally, the only product you should produce is the product that your customer wants; no more, no less. More production creates inventory. Less production creates a shortage. The risk of having too much inventory is that it may spoil, become obsolete, or never leave the shelf. Think about computer chips. Once the new version of computer chip comes out, who is buying the older version? Typically, nobody, or if they do, they are receiving a sizable discount. Another problem with inventory is that the thing you need may get lost behind the thing you don’t need. So, you end up producing more inventory that can hide the next thing, and the cycle continues.
Motion
This waste addresses the effort required to complete a task. If you must reach over your head, or grab something from the ground, you are using extra motion. If you must go away from your area to track something down and retrieve something, you are using extra motion. Ergonomics, which is the study of people’s efficiency in their work environment, is a method to identify and reduce excess motion.
Waiting
Time lost while waiting for an answer, a return email, an earlier process step, booting up your computer, or general waiting around is considered waste. It can be frustrating, time consuming and adds to the overall time in the process, which delays delivery to the customer. The key is to find the things that force you to wait and strive to eliminate them. Empowering people to make decisions is a quick way to drive waiting time down.
Overproduction
Have you ever noticed people who print out every email that they receive? This is an example of overproduction. How about a production line that is running really well and the managers want to keep things running? While the current product gets produced, the next product waits. There is a risk there will be a shortage of the raw materials to make the next product, or that there will be a delay in shipping the next product to the customer.
Overprocessing
This waste refers to the complexity in the process. If there are more steps than needed, or if the product or service is delivering beyond the requirements of the customer, this can be thought of as overprocessing. In the 1930’s, there was a cartoonist named Rube Goldberg, who devised the most complex ways of completing simple tasks. It was entertaining and creative, but not the ideal way of accomplishing work.
Defects
When the product or service doesn’t deliver to the required level of quality, this is considered a defect. When something has to be reworked, this is considered a defect. Many companies try to instill a culture of “Doing it right the first time.” They want to ensure that each process step will continue adding value to the benefit of the customer.
Unused Employee Creativity
The people who do the work generally have ideas to make their work simpler and safer. The best companies listen to their employees to get improvement ideas. Other companies think they know all of the answers and ignore suggestions by their employees. We don’t want people to shut their minds off when they come through the door, or we will be responsible for the worst waste of all.
In order to reduce or eliminate waste, you must be able to identify it. These eight wastes are easy to find in any process, if you are willing to look. If you make it a habit to reduce or eliminate these wastes, your customers will benefit. If your customers benefit, so will you.

What Process Improvement Partners Can Do for Your Team
Process Improvement Partners LLC offers a variety of services that help teams achieve breakthrough results. Some are narrow in scope, while others are strategic in nature. Some are quite simple, and others are extremely complex. In all cases, we strive to apply the right service to our customer’s needs, providing hands-on assistance, where needed.
Process Improvement Partners LLC offers a variety of services that help teams achieve breakthrough results. Some are narrow in scope, while others are strategic in nature. Some are quite simple, and others are extremely complex. In all cases, we strive to apply the right service to our customer’s needs, providing hands-on assistance, where needed. Here is a summary of our services, and when you might want to consider using them:
Site Assessment
If you want to see what opportunities are available to you, or don’t know where to start, take this 5 to 6-hour test drive with us. Everyone learns something new in this session. Together, we will identify the highest value opportunities and develop the plan to realize those opportunities. Some teams decide to take on the work themselves, others choose to engage us. Either way, it’s time well spent.
Cost Reduction Ideation, Prioritization, and Implementation
If you need to drive out costs in your business without negatively impacting your customers, this session is for you. Team members are challenged to come up with new and more efficient ways to do what they do, focusing on the cost impact to the organization. Once they have heard from their customers, they creatively brainstorm cost reduction opportunities, prioritize those opportunities, and then more fully develop and analyze those opportunities for customer and cost impact. At the end of the session, the team has a roadmap to drive significant costs out of the business.
Strategic Planning (VSM)
The first step in any continuous improvement journey. This session opens the eyes of all participants to the wastes and inefficiencies in their current processes and provides a roadmap to improvement that will be a direct benefit to their customers. Often, the team identifies simple and quick changes (6 – 12 months) that will reduce lead time to their customers by more than 50%, free up space, reduce the need for inventory, and improve quality and safety performance. This session also changes how people manage and lead in their processes moving forward. The benefits are felt immediately by those who work in the process, as well as customers of the process.
Workplace Organization (5S)
This session makes an immediate, visible and measurable impact on safety and productivity in a work space. It’s fun and fast paced, as team members learn how removing clutter, organizing items into optimal locations, maintaining resources in top condition, and implementing audits of the area can improve the lives of the people working in the space. Team members may get emotional at the end of the session, as they are positively impacted by the experience.
Breakthrough Creativity (3P)
Based on the proven 11-step Nakao method, this session is designed to drive teams to places they never dreamed possible in a 4 ½ day session. It is extremely challenging and exciting, as team members find solutions to problems that eluded them previously. This session is not for the faint of heart, as team members will work at a rapid pace and for long hours. When the session is over, it’s not unusual to have reduced project time by 6 months or more.
Changeover Reduction (SMED)
If you find that you are constantly expediting orders due to long product changeover times, this is the session you need. Using Single Minute Exchange of Die (SMED) methodology, teams typically reduce changeover times by half or more by the end of the session. Your customers will see the benefits of this session too, as lead times will be reduced as well. Teams will be trained so that they can apply the approach to other areas of their business in the future.
Process Optimization (Standard Work)
This session brings people together to determine the safest, most productive way to accomplish critical tasks. The team is guided through this session to create the new standard work for the improved process and develop the managing systems to ensure that everyone follows it once implemented.
Failure Prevention (FMEA)
An industry standard approach to stopping problems before they happen through the identification, prioritization, development, and implementation of preventative actions. This session stretches team member thinking as they are challenged to identify all of the ways a process could fail, whether the process has been implemented or not. Through a standard scoring system, these failure modes are prioritized for greatest negative impact to employees and customers. Once the session is over, the team will have a strong plan of action to keep these potential problems from occurring.
Plant Reliability Improvement (OEE)
This ongoing effort to drive to World Class Reliability utilizes Standard Work, Visual Management, Changeover Reduction, Shop Floor participation, Best Practice maintenance, and Continuous Improvement events. The team will build a road map of actions and strategies to improve Plant Reliability, and then they will be given assistance with any or all of their identified actions. We step back when the organization is ready to take full ownership of the improvement efforts.
Cultural Transformation
What does it take to drive an organization to a culture of continuous improvement? This ongoing effort utilizes leadership coaching, mentoring, demonstrations, and implementation of the key drivers of cultural transformation. The team starts with their vision and mission, and then designs all of their actions around them. Assistance is provided until the organization has shown that it owns the change that it seeks.
Visual Management and Shop Floor Participation (Gemba Walks)
The people who work in the process know what’s going on and are just waiting for an opportunity to share their ideas for improvement. This session engages the shop floor work force and improves accountability for daily results. The team builds a plan and leadership actions that will drive shop floor performance to higher levels and improve workforce engagement. Once the team implements visual management, there will be alignment and accountability for the most important results.
Best Practice Facilitation
How is that the best facilitators look like they aren’t doing anything at all, while the teams they are working with are making breakthroughs? This ½ day training session will provide the tools, methods, and hands-on practice to improve skills of the participants. The result will be more productive meetings and events.
If you don’t know which of these services to choose, just contact Process Improvement Partners LLC, and we’ll help you determine your best course of action. We are totally committed to your success. These sessions can drive your operating results to new heights.

Value Stream Mapping: The First Step on Your Continuous Improvement Journey
You can’t reach your destination if you don’t know how to get there. Maps, or in our technology-driven world, GPS systems, are critical resources for guiding you from point A to B. The same is true for your continuous improvement journey. Unlike your GPS, however, you must build your map through learning. The best way to build it is with Value Stream Mapping.
You can’t reach your destination if you don’t know how to get there. Maps, or in our technology-driven world, GPS systems, are critical resources for guiding you from point A to B. The same is true for your continuous improvement journey. Unlike your GPS, however, you must build your map through learning. The best way to build it is with Value Stream Mapping.
Value Stream Mapping views everything from the eyes of the customer. Anything that the customer would not pay for is considered Non-Value Added and is waste. The key to Value Stream Mapping is to see the waste in the current process and then develop strategies to remove as much waste as possible, delivering maximum value for the customer.
There are the 8 key components of Value Stream Mapping:
Identify the Value Stream to Map
What is the family of products or services that the customer is willing to pay for? Often, companies will pick a product or service that represents a significant portion of their overall demand or represents most of the process steps. It is better to pick a simpler process the first time Value Stream Mapping is attempted, increasing the complexity of processes to map as experience grows.
Build the Team
The members of the team are critical, as they will learn together and become supporters of the work going forward. The team should be diverse, comprised of people in the process, people who manage the process, customers of the process, and suppliers to the process. It can be beneficial to add a few team members who have no relationship with the process, as they provide “outsider” thinking and can challenge the team during the session.
Voice of the Customer
What is most important to the customer, from their point of view? Often, companies will engage Sales and/or Marketing to represent the customer, based on interactions they have had while dealing directly with customers. It is more powerful to invite direct customers to these sessions, but it can also be risky, as they will see some of the waste or inefficiencies in the current process. Most customers appreciate the opportunity to participate in these sessions, and the rewards far outweigh the risks.
Walk the Current State Value Stream
This is typically the most “eye-opening” part of Value Stream Mapping. The team should leave the meeting room and physically walk the process from the last step to the first. If they are mapping a physical product transformation, the team starts at the shipping dock, and then works their way back to the receiving dock. Start with the customer and what they are expecting to be delivered, then work your way back to the beginning of the process. All the while, the team is looking for waste and inefficiencies. They should be taking notes, pictures, and engaging with each other and others working in the process to fully understand what is going on and why things are working or not working as expected. If the process is virtual, the team should be demonstrating the steps of the process as they occur. Do not discuss the process in a meeting room. Go see what’s actually happening.
Gather data for the Current State Value Stream
How long does each process take? How many resources are needed for each step? How much inventory or waiting occurs at each step? How is information communicated to each step? How long does it take to change from one product or service to the next? How much space is required by each step? There is so much data that can be gathered, that you have to be careful not to do too much and miss the simplest and most impactful opportunities in the Current State.
Map the Current State Value Stream
Once the team returns to the meeting room, they map out all steps and interactions between steps of the process. This is a team activity, so don’t let just one person do all of the work. Each team member can take a pack of sticky notes and write down steps, placing them in order on a wall or something similar. Next, the team should measure the total time it takes for the product or service to get through the Value Stream, measuring the value-added time, non-value-added time, and lead time. Don’t use a computer, this is a visual activity, and most “A-ha” moments occur while placing steps on a wall and seeing how inefficient the current process is. Don’t be surprised if less than 10% of the time is value-added. In many manufacturing plants, that number drops below 1%. One key point is to map the process as it is, not how you want it to be.
Build the Future State Map
The team develops a vision of what they want the process to be in the future, for the benefit of the customer. By seeing the waste and inefficiencies in the Current State Map, the team imagines what the process would look like if they minimized or eliminated non-value-added steps, inefficiencies, defects, safety issues, and other waste in the current process. After the map is created, the team recalculates the value-added time, non-value-added time, and lead time in the future state. It is not unusual to drop the overall lead time to the customer by 50% or more. It’s also not unusual to identify quick, simple activities to accomplish this lead time reduction.
Create a Plan to Achieve the Future State
The team builds a roadmap of activities and strategies to make the changes required to drive to the Future State. These activities are typically low-cost and quick to implement, but some activities require an entirely new way of leading and managing the process. The team develops the action plan, with owners, due dates, and the managing systems to ensure that the work gets done.
A typical Value Stream mapping session takes between 3 and 4 days. When it’s over, everyone knows their new destination and how they intend to get there. Now, leadership has identified what is necessary to take the journey. Just like any journey, you must take the first step. Value Stream mapping is that first step.

Why Request a Site Assessment?
When you call Process Improvement Partners LLC for a site assessment, you are making a choice to invite outside perspective for your organization. While there is a fee for this service, there is also a significant investment of your time and resources, so it is good to understand the value of your investment.
When you call Process Improvement Partners LLC for a site assessment, you are making a choice to invite outside perspective for your organization. While there is a fee for this service, there is also a significant investment of your time and resources, so it is good to understand the value of your investment.
By the end of this 5 to 6-hour visit, you will have a greater understanding of where the highest value safety, quality, customer service, and cost opportunities are and how to leverage them. Here’s a typical site assessment agenda:
9:00 am - Team Introductions
A short review of each participant, their role, the company, and Process Improvement Partners LLC. We get to know one another and start the conversation on a personal and business level. It serves as a quick check of the team’s level of commitment, based on who is participating in the assessment and for how much time during the day.
9:15 am - Safety Review
How will we keep each other safe during the assessment? How important is safety to the site team and how strong is the safety culture of the company? During the visit, we will respect all of the safety requirements and expectations set by the team.
9:30 am - Review the Site Team Focus and Priorities
What are the priorities of the site team? What are the current pain points in their view? What do they want to focus on during the assessment? These discussions keep everyone aligned around the purpose of the assessment and make it more meaningful for all involved.
10:00 am - Plant Walk (Gemba Walk)
We walk the process with the site team, visiting all areas, speaking with people in the process, and looking for waste and inefficiencies. The more engagement we have with people in the process, the better. When waste is spotted, we stop and discuss what we see as a team. All team members are encouraged to take notes, so that they document what they see while on the walk.
11:30 am – Review of Findings
What did we observe on the plant walk? What did we learn from those in the process? Does it validate or invalidate our initial thinking? Did we learn something new, just by the way we engaged with others on the walk? Might this be an approach to incorporate into the way we do business moving forward?
12:00 pm - Lunch
Keeping the team together during lunch is critical. Although this seems like a minor detail, it’s an opportunity to relax and discuss things in a less formal way. It also lets the team get a feel for how an ongoing relationship with Process Improvement Partners LLC might look.
12:45 pm - Evaluate and Prioritize Opportunities
Based on everything we saw and discussed, what are the key things that the team wants to work on now and in the future? Using quick facilitation and prioritization techniques, the list of observations and ideas is narrowed to a top 5 to 10 that the team finds most important and impactful.
1:15 pm - Discuss Approaches to Leverage Top Priority Opportunities
We now discuss the tools and techniques available to drive improvement in the top priority opportunities. This is the time to decide whether the team wants to work on these opportunities without outside assistance, or with the help of Process Improvement Partners LLC. We will charter and write proposals for any work that the team feels it needs help with.
1:45 pm - Plan of Action
What are the next steps? Who is responsible? Does the team want Process Improvement Partners LLC to charter and write a proposal for the work? Is there a contact person for the work? We build an action plan that will be followed once the assessment is complete.
2:15 pm - Wrap Up and Feedback
An opportunity to review how the site assessment went for all participants. This is a learning moment for all involved, as we are applying process improvement in real time to the assessment process.
2:30 pm – Additional Time for Discussion or Adjourn
If the team wants more time to discuss the assessment, we always set aside additional time for them. If there is nothing left to discuss, the assessment is complete.
At the end of the site assessment, the team has a roadmap of activities that will help them improve their performance in safety, quality, customer service, and cost. In addition, they have had an opportunity to see how an ongoing relationship with Process Improvement Partners LLC can help them execute their roadmap.

How to Drive Teams to Success with Effective Facilitation
The best facilitators look like they’re doing nothing at all. The team is driving toward a solution, being creative, working together, and having fun. What’s the facilitator doing, just taking credit for the team’s hard work? As it turns out, the easier it looks, the harder it is.
The best facilitators look like they’re doing nothing at all. The team is driving toward a solution, being creative, working together, and having fun. What’s the facilitator doing, just taking credit for the team’s hard work? As it turns out, the easier it looks, the harder it is. But, if you use these techniques, you have a chance to look like you’re doing nothing, and doing it really well!
1. Stick to the charter.
This is the reason the team got together in the first place. Make sure all activities are conducted within the scope of the charter. It’s very easy to get off-track, or work on things that aren’t explicitly in the charter. The team should be reminded and guided back to the charter. An easy way to do this is to share a copy of the charter with every team member and have them read and discuss it at the appropriate time(s). They should be able to recognize if they are veering away from the charter.
2. The team solves the problem, the facilitator guides them to the solution.
Keep the roles separate, as the team will sometimes want the facilitator to give them the solution. This is not a good idea, as the team must own the solution and will not if they didn’t come up with it. The facilitator is responsible to come up with a solution path for the team, not the actual solution. There are times when a facilitator may have to provide direct help, but this should be rare, and only used as a last resort.
3. Everyone participates with an equal voice.
It’s very easy for some team members to dominate conversations, but in doing so, other team members may not have an opportunity to share their ideas. When this happens, there is no true consensus or full support for the solutions developed. Great care must be taken to give every team member an equal voice. One technique to do this is to give everyone a pack of sticky notes and let them write their ideas down, one per sticky note. Then, they share one idea at a time, one person at a time. Place each sticky note on a flip chart for everyone to see. Be careful not to let a team member share more than one idea before another team member gets a chance to share.
4. Keep the team moving.
I mean this both mentally and physically. If team members sit in one place too long or spend too much time on one topic, they will get bored, disengaged, and lose momentum. Get the team members out of their chairs, moving around the room, or out of the room. Break up activities into small chunks, so that there isn’t a chance for complacency or boredom. This tests the facilitator’s creativity, but it is vital for positive momentum and progress.
5. Time is precious. Break down barriers to progress.
Sometimes the team is looking for an answer and the expert is not in the room. A good facilitator will challenge the team to get the answer from someone else, in a different way, or by some quick estimate. In extreme cases, the facilitator will encourage the team to interrupt a meeting to get the answer they need. In even more extreme cases, the facilitator will get the answer for the team by interrupting a meeting or going to a higher-level leader for an answer.
6. The more ideas the better.
When a team is thinking up ideas and alternatives, their first ideas are typically things they are most comfortable with or don’t challenge them. Facilitators should drive the team to think of things that haven’t been tried before. The first step this is to ask team members for more ideas. Most people can come with 3 alternatives for almost anything. Ask for 7 in this case. If the team has stopped writing ideas, ask questions in as many different ways as possible, pulling more ideas out of the team. When we challenge ourselves, we are more often able to deliver breakthroughs.
7. Don’t let best get in the way of better.
We want teams to make improvements. Sometimes team members want things to be perfect before trying their solutions. The problem with this is that nothing is perfect and if we wait to have everything perfect, we will never test our improvement(s). So, the facilitator should encourage team members to try their ideas out before they are fully designed. It’s perfectly acceptable to make mistakes, as long as we learn from them and improve upon them. I tell teams to shoot for 60% confidence. It gives them more opportunities to try things quickly.
8. Use frequent check-ins of progress.
Once team members start working on their improvement projects, it’s easy to assume everything is going as planned and issues are addressed when they arise. However, that’s often far from the case. Team members often get stuck and struggle on their own until time runs out, if left to their own devices. Frequently connect with the team to check on their progress and determine any areas needed support. I have found that 1 ½ hours is about the maximum amount of time that team members should work independently before coming back together to share their progress. This is also a way to integrate efforts of different team members and eliminate duplication of efforts.
9. Teams that are having fun will accomplish more.
People like to win, laugh, have fun, and share in success. As a facilitator, you should be looking for ways to help the team win. Find activities that will make their time spent together engaging and fun. You may even need to develop team activities that help them work together better.
10. Less you, more them.
The reason the team was brought together was to solve a problem. If you had the answer to the problem, you wouldn’t need a team in the first place. A good facilitator will encourage as much participation from the team as possible by asking probing questions and creating a participatory atmosphere. Once the questions are asked, you must allow the team answer to them, not you. Often, they will want an answer from the facilitator, but you must resist the temptation. This is their effort, not the facilitator’s, so it’s best to let them struggle through hard questions.
These 10 facilitation techniques take practice, but they will help you get the best out of the teams you are working with. Take pride in knowing your teams solved their problems and it appeared you did nothing at all to help them!

How to Use Kaizen to Ensure Teams are Invested in Process Improvements
In 2005, I was helping a team improve the safety and productivity of their operating line. During a 4-day span, each of the team members was able to try and implement many different ideas that arose from their creativity.
In 2005, I was helping a team improve the safety and productivity of their operating line. During a 4-day span, each of the team members was able to try and implement many different ideas that arose from their creativity. At first, they didn’t believe that they would be allowed to make changes to the operating line, but after each successive attempt, they grew more and more confident, and the energy, enthusiasm and momentum grew. At the end of the 4 days, each of the team members reflected on their experience. One of the team members was a gruff mechanic who had been skeptical at the beginning of the session. He stood up with tears in his eyes and stated that this had been the most meaningful and impactful experience of his working life. I knew right then that I wanted to bring this joy to as many people as possible.
Kaizen brings people together to solve problems in their area of concern. They have the most understanding, experience, and vested interest in the effort. They also reap the benefits of the improvements moving forward. Kaizen asks us to make things better, not perfect, and go rapidly, without investing anything but the time and energy of the people making the changes. There may be some minimal cost, but because things are going so fast, a significant financial investment isn’t likely. Using the speed of Kaizen and the creativity of the team, I developed 3 approaches to drive the deep and emotional connection to improvement that I was seeking.
1. Idea Gathering and Sharing with Sticky Notes
Each team member takes a pad of sticky notes with them as they tour the area of concern. With guided questioning, the team members write down their personal observations or ideas that come to mind while touring. It is quick, personal, and drives ownership and accountability to come up with ideas for the benefit of the team and the people in the area. I ask each team member to write down one idea per sticky note, so that nothing gets missed and it’s easier to organize ideas as a team once we have reconvened. In the meeting room, I have the team members share all of their ideas, one person at a time, one idea at a time. Each idea is placed on a flip chart or on a wall for everyone to see. If there are 15 team members, I have each person share one idea until the team has heard 15 separate ideas. Then I give them a chance to share their second idea, third idea, and so on, until the team has run out of ideas. This creates an atmosphere where everyone has equal voice, regardless of position, experience, or pay grade.
2. Prioritization with Criteria
Once the ideas have all been shared and posted, the team may choose to group similar ideas together. This gives them the chance to see all of the ideas and remove any redundancy. Following this, each team member is asked to pick his or her top ideas using these criteria:
a. Provides the biggest benefit to our team and our customers
b. I personally want to do this
c. We can do this during the allotted time of the event
Everyone is given an equal number of votes (usually between 3 and 5), so no team member can dominate the conversation or the voting. These criteria are interpreted differently by each team member, but in the end, this approach creates a list of the team’s top priorities. This approach generally takes no more than 10 – 15 minutes.
3. Pick Your Project
We now have a list of things to work on, prioritized by the amount of votes the team has placed on them. I then list the top 3 or 4 projects on a flip chart, depending on the size of the team. Now it becomes personal, as I tell the team, “First come, first served. Place your name on the project you want to work on.” More than a few times, team members rush to the flip chart to put their names on a project. They want to ensure they get the project that matters to them the most. This may sound risky, as a project may not get claimed. I have never seen this happen. Team members have different interests and you can’t always guess what they are, so I have stopped doing that. Also, if there aren’t enough team members on a project, I ask if there’s anyone willing to swap projects. Often, there are a few team members who don’t have a real preference, so they are happy to change projects.
Now that we have personally observed and shared issues, picked our projects, and assigned the work to the people who want to do it the most, we have the foundation for the deep personal connection to the improvements that we seek. Sometimes a team member will find it moving enough to convince others to get involved in future efforts and find the same joy that they did.

Three Tips in Preparation for a Successful Improvement Event
Improvement Events are used to bring teams together to solve critical problems in a fast, engaging, and sustainable way.
Process Improvement Partners LLC was founded to help teams achieve breakthrough improvements in safety, quality, customer service, and productivity. Improvement Events are used to bring teams together to solve critical problems in a fast, engaging, and sustainable way. These Improvement Events, also known as Kaizen Events, can vanquish problems forever when they are done well. Preparation is a key component for success. In the spirit of helping teams achieve the best possible results, here are three tips to help you successfully prepare for an Improvement Event:
1. Develop a Strong Charter for the Event
At least 4 weeks before the Improvement Event, the Leader, Sponsor, and Facilitator of the event should come together and align around a charter for the event, which asks these four questions:
Problem - What is the problem that the team is being asked to solve? Why is it a problem, what is the impact of the problem on the business or the customer(s), and what would happen if the team could solve the problem?
Objectives - What are the objectives of the Improvement Event? What are the measurable results to be achieved? What would be the tangible evidence be that would show that the problem has been solved?
Team – Who are the people who can help solve the problem during the Improvement Event? Who has the interest, enthusiasm, and creativity to come up with potential solutions in a short period of time? Who can facilitate this event, to help the team on its way to a solution? Who will lead the team?
Output Owner – When the Improvement Event is over, who is responsible to implement the solutions developed by the team? Who will make sure that changes are properly communicated? This Output Owner should ideally be the Team Leader, as they will only agree to solutions that can implement and support.
Once the charter has been agreed to by the Leader, Sponsor, and Facilitator, the team is empowered to develop and implement their solutions to the problem that they are asked to solve. There is no need to gain approval for their solution after the Improvement Event. They are encouraged to get input and feedback during the event, to ensure that they have considered all aspects of the problem and potential solutions.
2. Create Leadership Alignment and Support for the Event
There should be an Executive Sponsor for the Improvement Event. This is the person that believes in the value of the event, supports the efforts of the team during the event, will remove roadblocks during the event, and will deal with resourcing issues that come up because the team members are being asked to fully dedicate their time to the event. The Executive Sponsor should communicate directly with the managers of each team member to gain their support and commitment to clear the calendars for their direct reports. Each team member should give their full focus and attention to the Improvement Event.
3. Plan Proper Facilities and Food
An Improvement Event is special. We are asking people to set aside their normal work and focus on a critical business problem. As such, we need to provide the proper food and facilities that will help them stay focused and engaged. Bring in morning and afternoon snacks, and feed the team lunch in their working space. If they stay together, they are more likely to stay focused on the problem at hand. If they disperse during lunch, they may get distracted, lose focus, or get drawn in to other business issues.The meeting space(s) should provide adequate space and privacy from outside distractions. There should be enough floor space and wall space to allow the team to try out and display their ideas and solutions. Improvement Events are interactive, visual, and energetic. People need to be able to move around freely and safely. If they need to use computers, there should be adequate power outlets available in the meeting space(s). Finally, they should have access to any resources necessary to solve the problem. Don’t move the team off-site if they need access to others in the company who may have vital information to share.
As you plan your next Improvement Event, keep these three tips in mind to give your team the best chance for success. The investment of time and effort will paid back many times over.

It's Better To Be Red Than Green
We have been taught that Red means stop and Green means go. In the context of Process Improvement, Red means that something isn’t performing as expected, and Green means everything is OK. But is it?
We have been taught that Red means stop and Green means go. In the context of Process Improvement, Red means that something isn’t performing as expected, and Green means everything is OK. But is it?
Most people don’t want to admit their process is Red, and will typically report things are Green. The problem is that they are missing an opportunity to get help before a small problem becomes a big problem. So, they go along thinking “I got this, it’s going to be OK” and report as Green, until “uh oh, it’s not going to be OK” and they need help to get things back on track. At this point, it is either too late, or extremely costly to get things back on track.
We should encourage people to report Red. We should make it simple and non-threatening to ask for help. I heard one company say, “We rally to the Red”. I believe that this is a great approach. It means that they see Red as a call to action, a call for help. It doesn’t feel like a personal failure if someone reports that their project is Red. It’s everyone’s priority to help get things back to Green. Imagine how much wasted effort and cost could be avoided if people were able to expose issues sooner and get help to resolve those issues.
Before founding Process Improvement Partners LLC, I worked with a testing facility that was required to achieve a number of monthly goals. Working with the leader of the facility, we established owners for each of the approximately 25 distinct operating and storage areas in the facility. The Area Owners were responsible for the monthly goals in their area and were required to report the status of the compliance of their area. Area status was Red until all monthly goals were met. The aim was to achieve Green status before the end of the month. If the goal wasn’t met by the end of the month, the status would stay Red. More importantly, the facility was not fully compliant and it affected the performance and safety of those who worked there.
When we first implemented this new approach, the Area Owners were frustrated. They didn’t want to be Red. So, we incentivized the process. If we got all areas Green by the end of the month, we would buy everyone lunch. Once we did that, they began helping each other with each area, making sure that all requirements were met. They even challenged their peers, who would wait until the end of the month to complete the requirements. They wanted to be compliant earlier in the month. The process became fun, everyone pitched in, and the testing facility was the safest and most productive it had ever been.
The moral of the story? When we encourage our team to be honest about areas needing improvement, ask for help, and create solutions, the sooner we move our productivity and effectiveness to Green.